
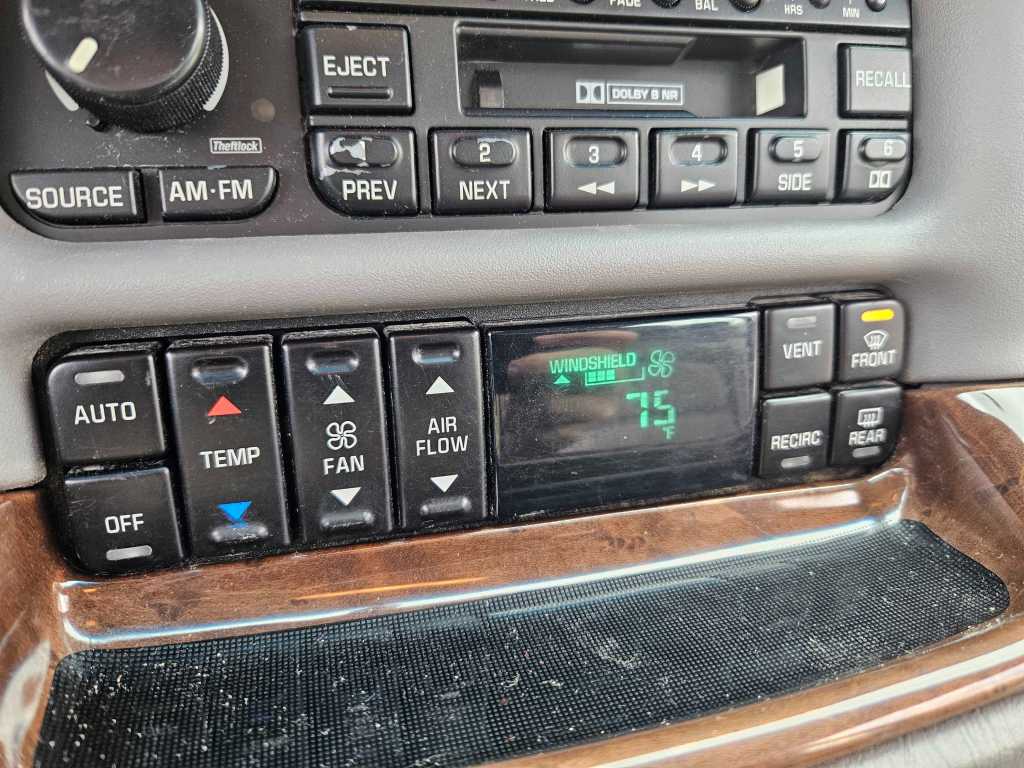
The screen you see here has been dead the entire time I’ve owned our 2004 Buick Park Avenue. After starting the vehicle, I would bash buttons blindly until it felt like air was becoming the temperature I desired. Little did I know, with just a tiny bit of soldering, and a few screws, this screen could work good as new. It’s certainly cheaper than buying another one from a scrap yard, and hoping it works.
To get the HVAC controls out of the dash, you need to remove a few things. On the driver’s side, you’ll see a side vent on the side of the dashboard. You can just use a flat head screwdriver to pop it off. Beneath it, is a single, 7mm screw holding the entire top part of your dash to the frame. Remove it, and then you can carefully remove the entire dashboard. It’s held in mostly with push clips that just pop right out.
I started with the bottom woodgrain piece first, and carefully popped it out. The top dash trim is sort of “lipped” on beneath it. I did break one small clip, but it really doesn’t matter. You do also have to put the car in “Drive” and drop the steering wheel to its lowest position to squeeze the top dash piece out of the way. Once all that is done, you can remove the HVAC controls themselves!
It’s held in with yet another two 7mm screws. Then, just use that screwdriver to carefully pivot it out. There will be one blue connector on the back. From the bottom of the connector, you’ll find a clip you can just pull down on slightly with the screwdriver, which allow it to slide off.
That’ll let you pull the controls out, and fix the circuit board within.
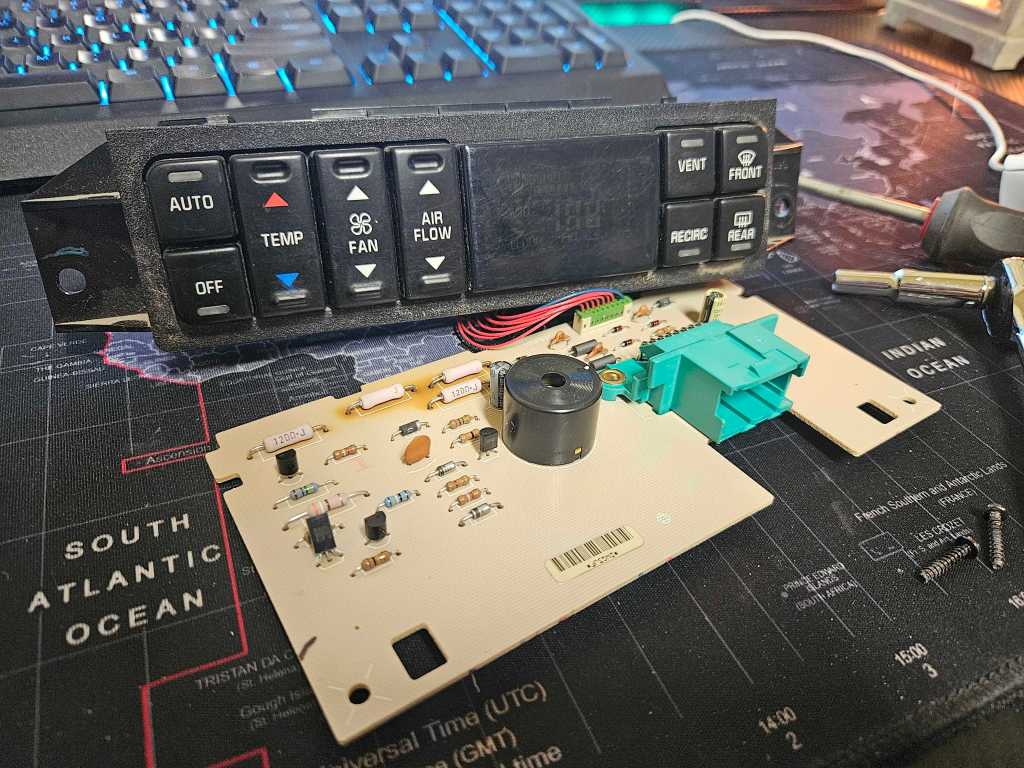
You can separate the back plastic to get this fella out, by removing the two, tiny 5mm screws holding it together. Then, two small, black clips are on the bottom, holding in that board. Pull them down, and pull the board out.
Now, you can see the three resistors in the top-left of the picture that have “brown” fading all around them. Those fellas have disconnected from the board. If you push them, you’ll feel them move around. That’s the issue! The circuit is broken in these spots, which is disabling the screen. Get you a 30 watt soldering iron from Walmart for 13 bucks, and re-solder the joints on each, until they’re once again connected to the board. Be sure you don’t burn the board!
When you put it all back in, your screen will be working once more!

Leave a comment